Forks surprisingly not, er, ‘forked’.
 |
| Inside the front brake. Yuk, right? |
Driven on by naive early enthusiasm, I’ve been putting in the hours in the workshop this week and have got a lot done.
Where you start on restoring a classic motorcycle? I’m sure there are good sensible strategies like stripping it all down and having an expert check over the engine before spending any money.
But I have decided I will start at the front and work back. That way I can be sure to be financially committed before I find any of the really expensive problems.
What’s the at the front? Yes, the front wheel. Off it comes, with its badly painted and slightly broken mudguard. A particularly awkward recessed nut (11/16” Whitworth apparently, rare even in 1971) eventually submits to reveal the innards of the front brake. It’s a drum brake, which is fine on a London bus, but was old tech for motorbikes even back then, mainly because they don’t work very well. It will have to be set up very carefully, but that’s for another day.
I strip down and clean the front wheel bearings, hub, brake parts and axle. The bearings are the old fashioned open type but in great condition, so I’ll keep them. Someone has been in here before though, as there are a couple of bits missing. This is going to be a continuing theme I think.Next the forks come out. It should be a case of just release the clamps and slide them out, but over they years they have become rather familiar with these clamps and are quite attached to them. Eventually, with a LOT of persuasion from a big mallet, they come free without destroying anything.The forks are one of the few modern(ish) things on this bike, 1971 was the first year that Triumph fitted telescopic forks with internal springs and damping which pretty much all bikes still have now. This, briefly, is how they work:
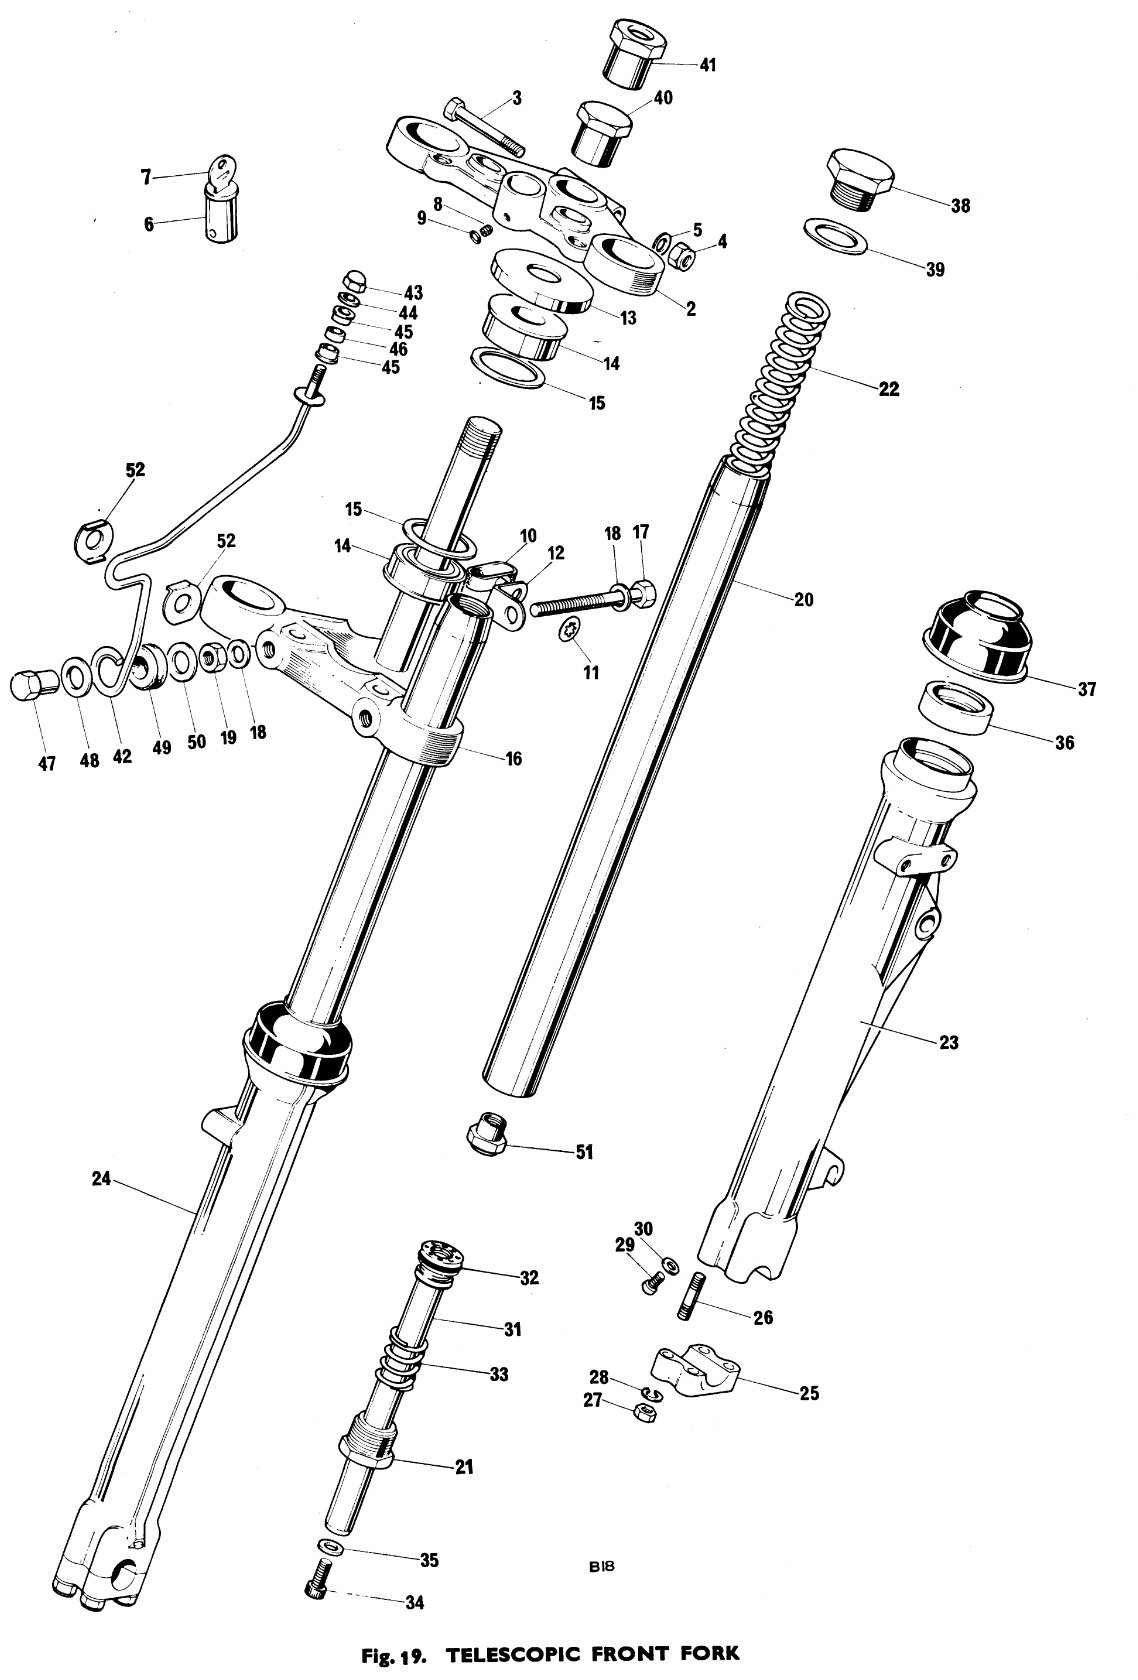 The shiny top part — the fork tube, part 20 — is bolted firmly to the bike’s headstock while the lower part — the fork leg, part 24 — is attached to the wheel axle. In between is a big spring, part 22, and the tube can telescope in and out of the leg as the load on the wheel changes. This not only protects one’s backside from a pounding on bumpy roads, but more importantly keeps the tyre in contact with the road.
If that was the whole story the bike would be unrideable, bouncing around like a pogo stick. Damping is needed, which is provided by the damper rod assembly, part 31. This is bolted to the bottom of the fork leg and has a piston, 32, at the top that moves inside the fork tube. The whole lot sits in a bath of oil.
If you hit a bump, the fork wants to compress but it can’t because the oil below the piston is not compressible. The oil pressure builds up and opens a ‘flapper valve’, revealing a series of holes in the damper piston that allow the oil to pass. So the fork can still compress, but in a controlled way.
If it’s a really big bump there’s a risk that the forks will bottom out, which is quite uncomfortable especially as it is likely to result in a crash. Triumph thought of this, and fitted a sleeve that sides over the damper rod. This covers up some of holes as the fork reaches the end of its travel, thus increasing the damping.
After you pass the bump, the fork wants to extend. Again it needs damping. The flapper valve closes, but there are still some small holes in the damper rod the oil can pass through, providing the required ‘rebound damping.’ In case it all happens a bit too quickly, there is a spring fitted to stop the fork topping out too inelegantly.
For these forks, that’s that. There are no adjustments or refinements. They only way to change the performance of the forks is to use different springs or different thicknesses of oil.
Talking of oil... there’s isn’t any in these forks. There’s a bit of rusty rainwater and that’s it. Hmmm. Despite this, the internals actually seem to be in good condition and even the springs might live another day. I’ll only need to replace the seals and damper o-rings. There are — you guessed it — a few parts missing though, notably the sealing washers at the bottom that stops the oil falling out. Mystery solved.
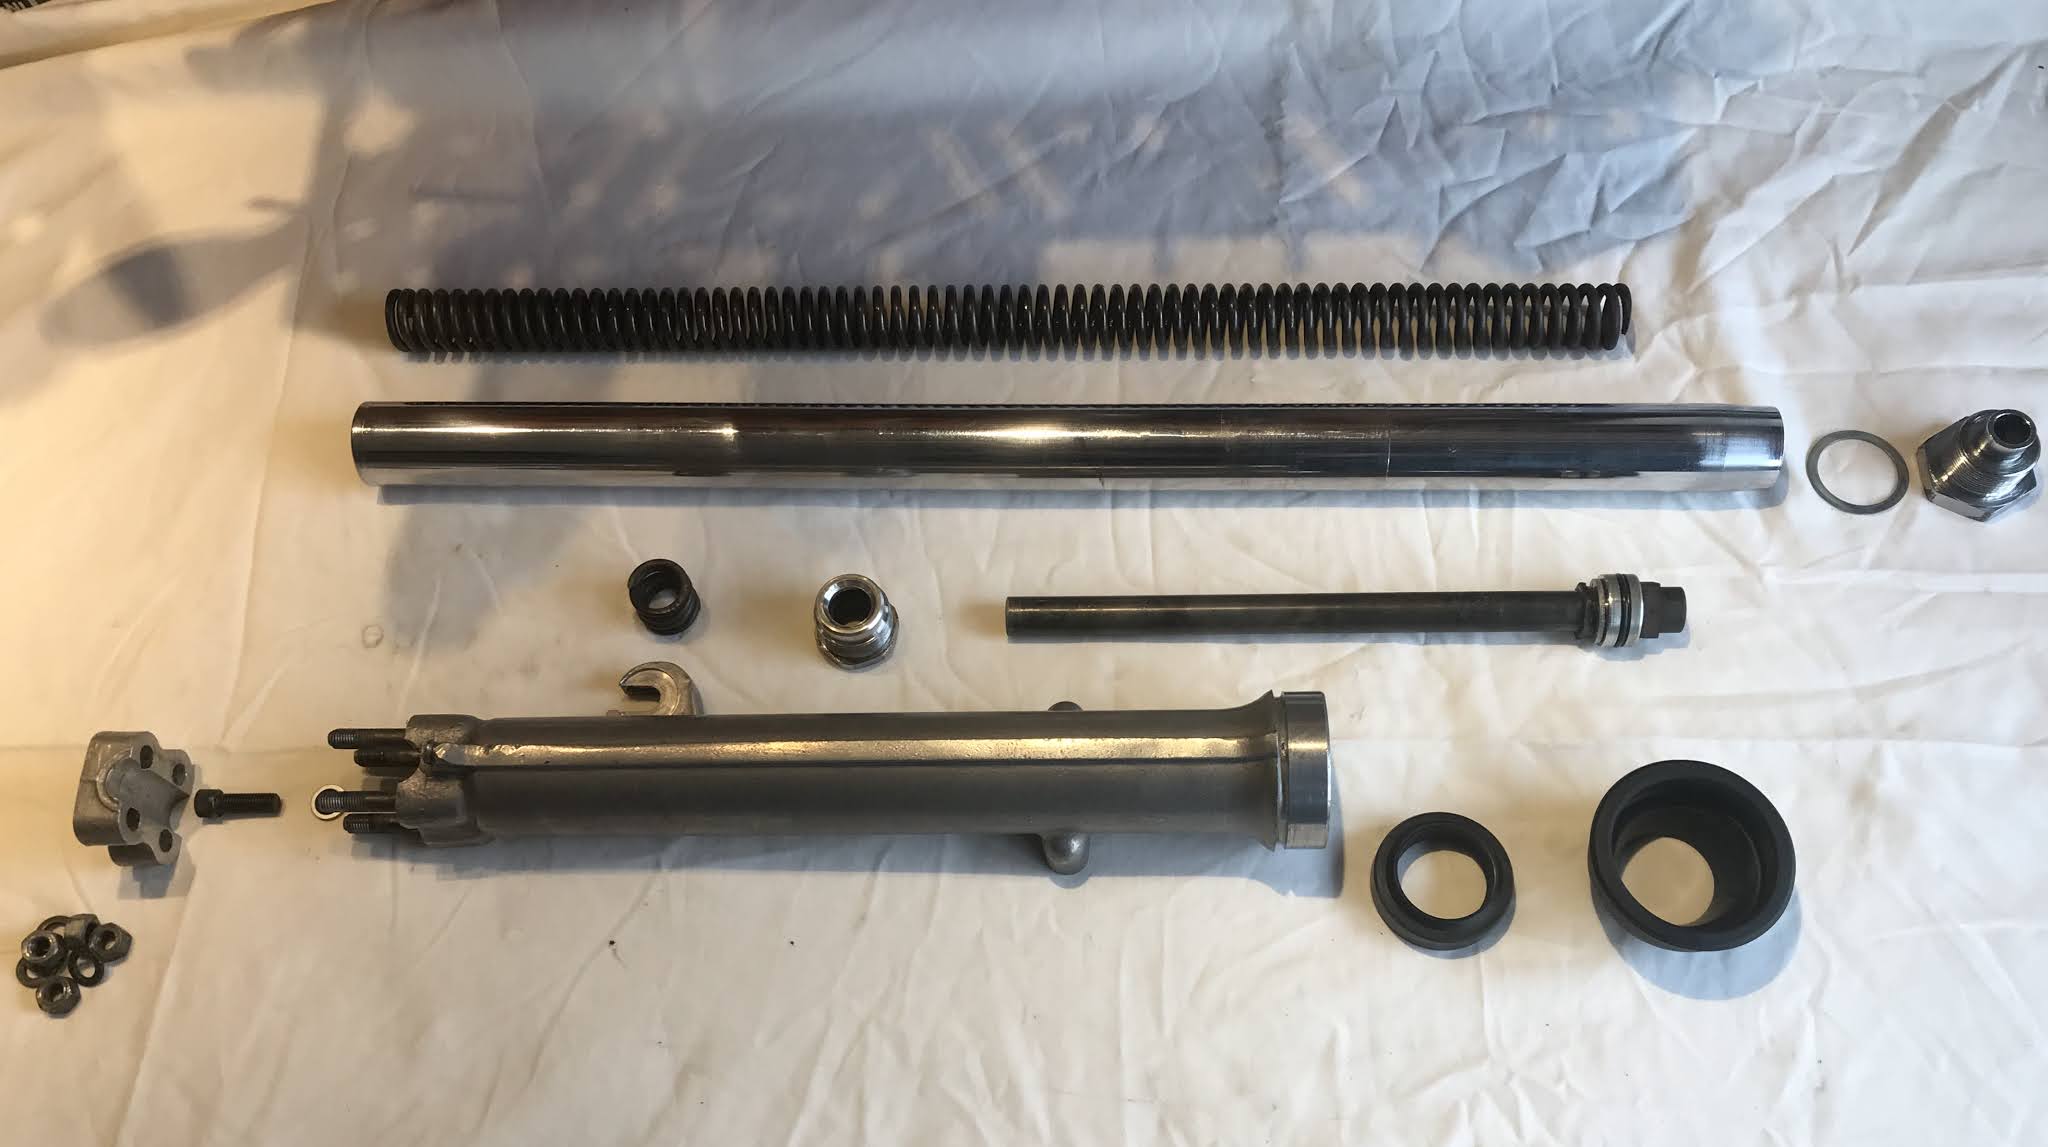 |
| One fork all cleaned and ready to reassemble. |
Next up, I remove and strip the headstock, which consists of the top and bottom yolks and the bearings in between, that allow the forks to steer. Once all the gack is removed these don’t look too bad either. Again, they are open bearings that need packing with grease but they are in OK condition. Again, there are parts missing, but nothing serious.
 |
| The headstock and bearings |
It’s an awkward repair, but with an expert bit of welding I am able to build up the metal back to its original form (the white bit in the photo).
OK, OK, it was a clumsy bit of welding followed by a lot of careful grinding into shape. It works great and I am inordinately pleased with myself, even if it does not look much in the picture. I also weld up the broken mudguard stay.
While I am doing all this, a chap arrives with a box full of goodies to replace some of the nastier and more worn out parts of the front end including the handlebar isolation rubbers, fork seals, brake parts, some of the missing bits and bobs and a bunch of electrical parts for another day.

The money is still flowing out rather freely, a bit here, a part there... hopefully I have now ordered all I need to finish the forks, headstock, front brakes, bars, controls and the electrics. Next time the front end should be finished and it will be time to look at the engine and the wiring. Joy!
TOTALS TO DATE: Hours: 26. Cost: £4923.


Must have been an uncomfortable ride without the oil...
ReplyDelete